EPSON GT-X830 Film Scanner Review: Digitizing Old Negatives with DPI Comparison and Digital ICE Results
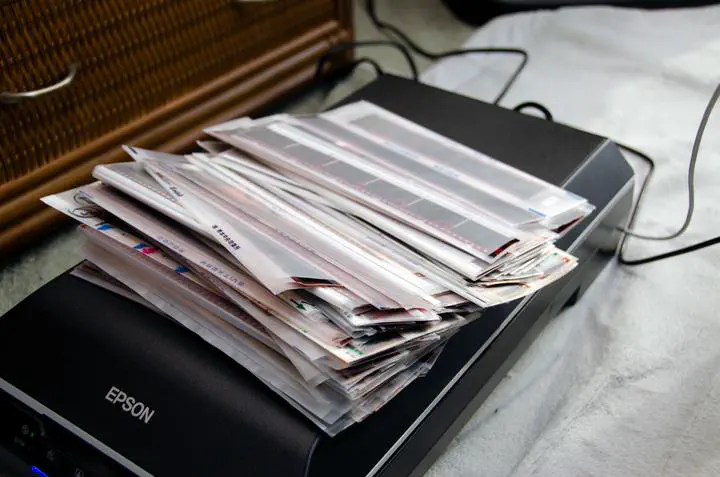 Image credit: Tomokatsu Yukishita
While organizing my parents’ home, I found a large collection of old photos and film negatives. They are full of irreplaceable memories, so throwing them away was not an option. Film negatives deteriorate over time if left untouched, so I decided to digitize them before it was too late.
How to Digitize Old Film: What Are the Options?
When researching how to digitize old photos, I found two broad approaches: doing it yourself or outsourcing to a service. The film market is shrinking year by year, which means the available options will likely continue to narrow. If you have old photos or negatives at home, acting sooner rather than later is the wise move.
Digitizing Yourself
Dedicated Film Scanners
- Kenko: KFS-1490 / KFS-14CB / KFS-1450
- plustek: OpticFilm 8200i Ai / OpticFilm 8100
- Sanwa Supply: 400-SCN006 / 400-SCN024 / 400-SCN034 / 400-SCN055 / 400-SCN041
Flatbed Scanners
- Canon: CanoScan 9000F Mark II
- EPSON: GT-X980 / GT-X830 / GT-F740
- Nikon: Film Digitize Adapter ES-2 (requires a compatible Nikon body and lens)
Outsourcing to a Professional Service
Professionals handle everything and deliver consistent results, but costs are higher. A good option if you have a large volume or limited time.
- Camera no Kitamura (Japanese camera retailer chain)
- Fushime Photo Studio (Japanese film digitization specialist)
- Fujifilm Scan Service
What I Chose: EPSON GT-X830
With a large volume of negatives to process, I selected based on these criteria:
- Minimal effort per scan (supports 12-frame continuous scanning)
- High image quality (up to 6400 dpi)
- Can also scan print photos (flatbed design)
- Reasonably priced
Canon appeared to be scaling back its scanner lineup, with inventory running low and long-term driver support uncertain. I chose the EPSON GT-X830 flatbed scanner based on EPSON’s track record for driver longevity.
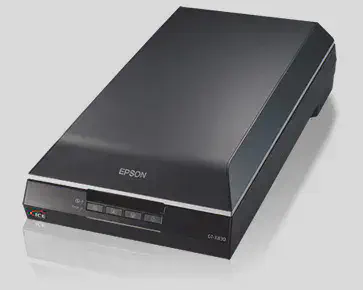
Source: EPSON GT-X830 product page

Appearance
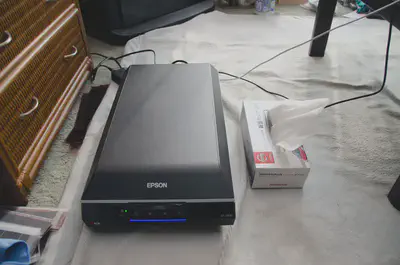
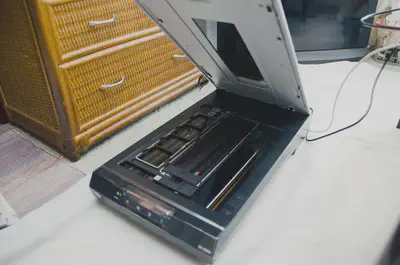
It is large and takes up considerable space, as you would expect from any flatbed scanner. You will need to plan ahead for where to put it.
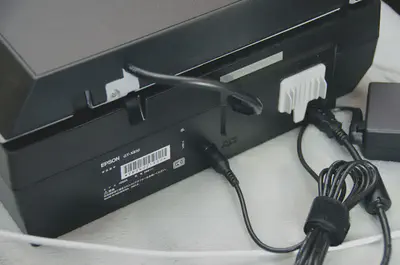
Connection requires only two cables: USB and power. Setup is simple.
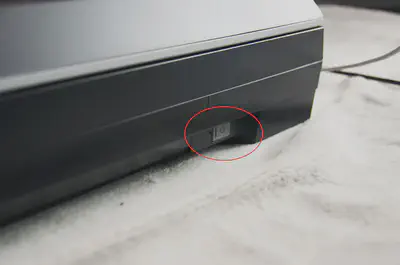
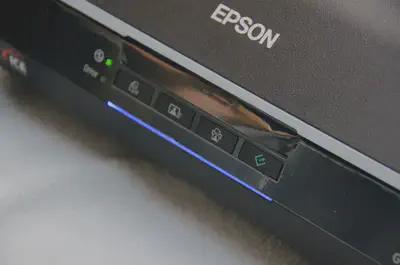
The power button is on the side and offers very little tactile click. You need to check the front LED to confirm whether the unit is on. It can also turn off accidentally with a light touch, which is mildly inconvenient.
How to Scan Film
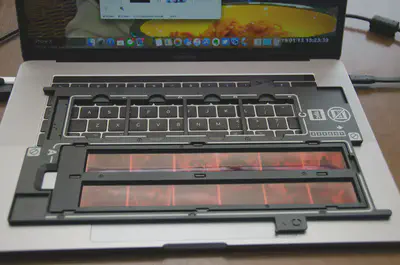
Load the film into the dedicated holder and place it on the scanning bed. Just make sure the film faces the correct direction. Precise alignment is not required — the scanner handles positioning automatically.
Scanning Speed Comparison (by DPI, Digital ICE ON/OFF)

Scanning takes time, but the 12-frame continuous mode means you can leave it running and do other work while it processes.
| Mode | Time per Frame | File Size |
|---|---|---|
| 1200 dpi | 0:35 | approx. 300 KB |
| 2400 dpi | 0:50 | approx. 1 MB |
| 4800 dpi | 2:15 | approx. 3.5 MB |
| 1200 dpi + Digital ICE | 1:54 | — |
| 2400 dpi + Digital ICE | 3:07 | — |
| 4800 dpi + Digital ICE | 3:40 | — |
Enabling Digital ICE Technology significantly increases scan time. Scanning 12 frames at 4800 dpi with Digital ICE works out to about 3 minutes 40 seconds per frame, meaning scanning time alone is roughly 44 minutes for a full strip. Including preview generation and file saving, a session can approach an hour.
Considering how much manual retouching Digital ICE saves, the time investment is well worth it if you are not in a rush.
(Test environment: MacBook Pro 15-inch, 2017 model)
Software: EPSON Scan
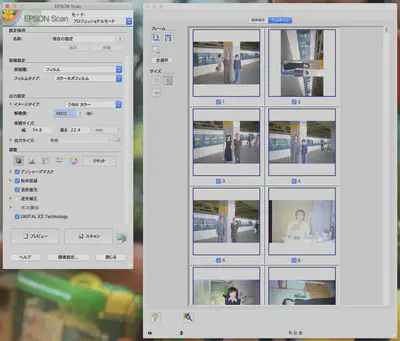
Scanning is done through the bundled EPSON Scan software. The interface is not particularly modern, but it covers everything you need. The Windows and Mac versions are functionally identical. For film scanning, set the document type to “Film” and the film type to “Color Negative Film.”
Image Quality: Results by Film Condition
Here is how different levels of film deterioration affect the scan output.
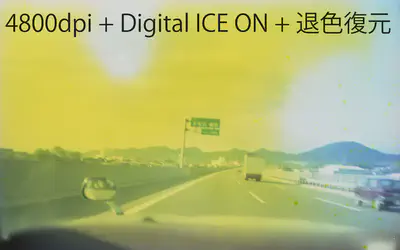
1970s: Heavily Faded Film
This film shows severe color fading. Digital ICE does a good job removing dust, but color restoration at this level of deterioration has limits — the underlying colors are largely gone.


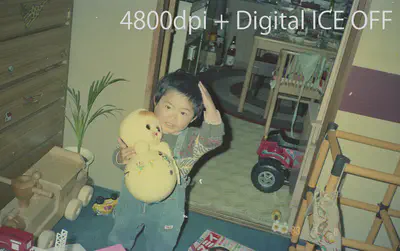
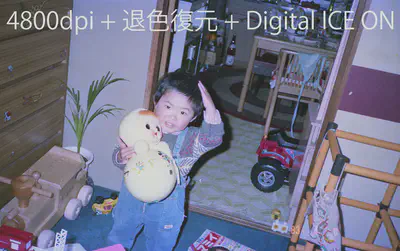
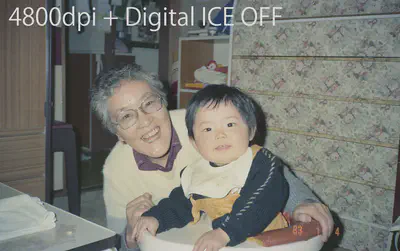
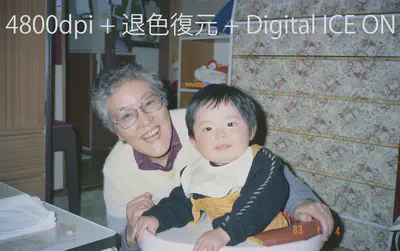
1983: Moderately Deteriorated Film
Large scratches are beyond what Digital ICE can fix, but overall the restoration is quite good. Auto color correction delivers a presentable result.


1983: Well-Preserved Film
Also from 1983, but stored under better conditions with much less deterioration. The colors are largely intact, and applying fading correction produces results that could pass for a modern photograph.


Overall Assessment
The GT-X830 is more than capable for digitizing film shot on standard film or compact cameras. If your goal is to archive professional DSLR film at maximum fidelity, the higher-end GT-X980 might be worth considering — but for a family photo archive, the GT-X830 offers excellent value for money.
Digital ICE takes time, but the dust and scratch removal is genuine and effective. The more deteriorated the film, the more noticeable the improvement.
Summary
Film degrades over time in a way that digital files do not. Waiting until “someday” risks reaching a point where restoration is no longer possible. Acting sooner is always the better choice.
| Feature | Assessment |
|---|---|
| Continuous film scanning | 12 frames per batch |
| Maximum resolution | 6400 dpi |
| Print photo scanning | Yes (flatbed) |
| Digital ICE effectiveness | Strong dust/scratch removal; limited color recovery on heavily faded film |
| Scan time with Digital ICE | ~3:40 per frame at 4800 dpi |
| Power button usability | Poor tactile feedback |
- GT-X830 strengths: Flatbed versatility, 12-frame continuous scan, automatic correction via Digital ICE
- GT-X830 weaknesses: Awkward power button, long scan times with Digital ICE enabled
- Best suited for: Anyone wanting to digitize a family film archive without professional-grade complexity or cost
Tomokatsu Yukishita (雪下 智且)
Engineering Manager / Real Estate Transaction Agent
Engineering manager connecting embedded development with cloud and AI. I apply quality standards from mission-critical systems to modern product and development workflows.