Build a Cloud-Connected Photo Frame with Raspberry Pi, Google Drive, rclone, fbi, and Python
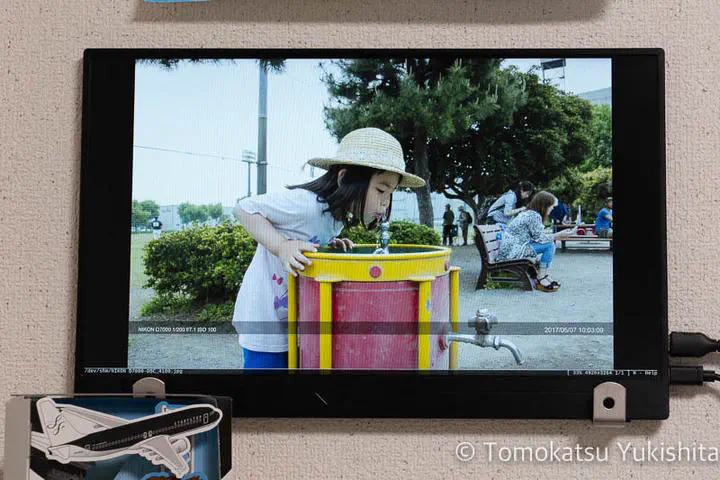 Image credit: Tomokatsu Yukishita
I have been shooting with a digital SLR since 2003, and my total shot count is now at 388,524. I wanted a way to display those photos as a slideshow at home — without the hassle of manually copying files to an SD card every week.
The Problem with Commercial Photo Frames
Most digital photo frames read images from an SD card or USB drive, in the 7–10 inch range. They work fine, but constantly re-copying photos is tedious enough to make you stop using it.
What I wanted was a photo frame that pulls photos automatically from cloud storage like Google Drive. No such product seemed to exist, so I built one.
Hardware
Raspberry Pi 4
A photo frame runs 24/7, so low power consumption matters. Raspberry Pi 4 fits well.

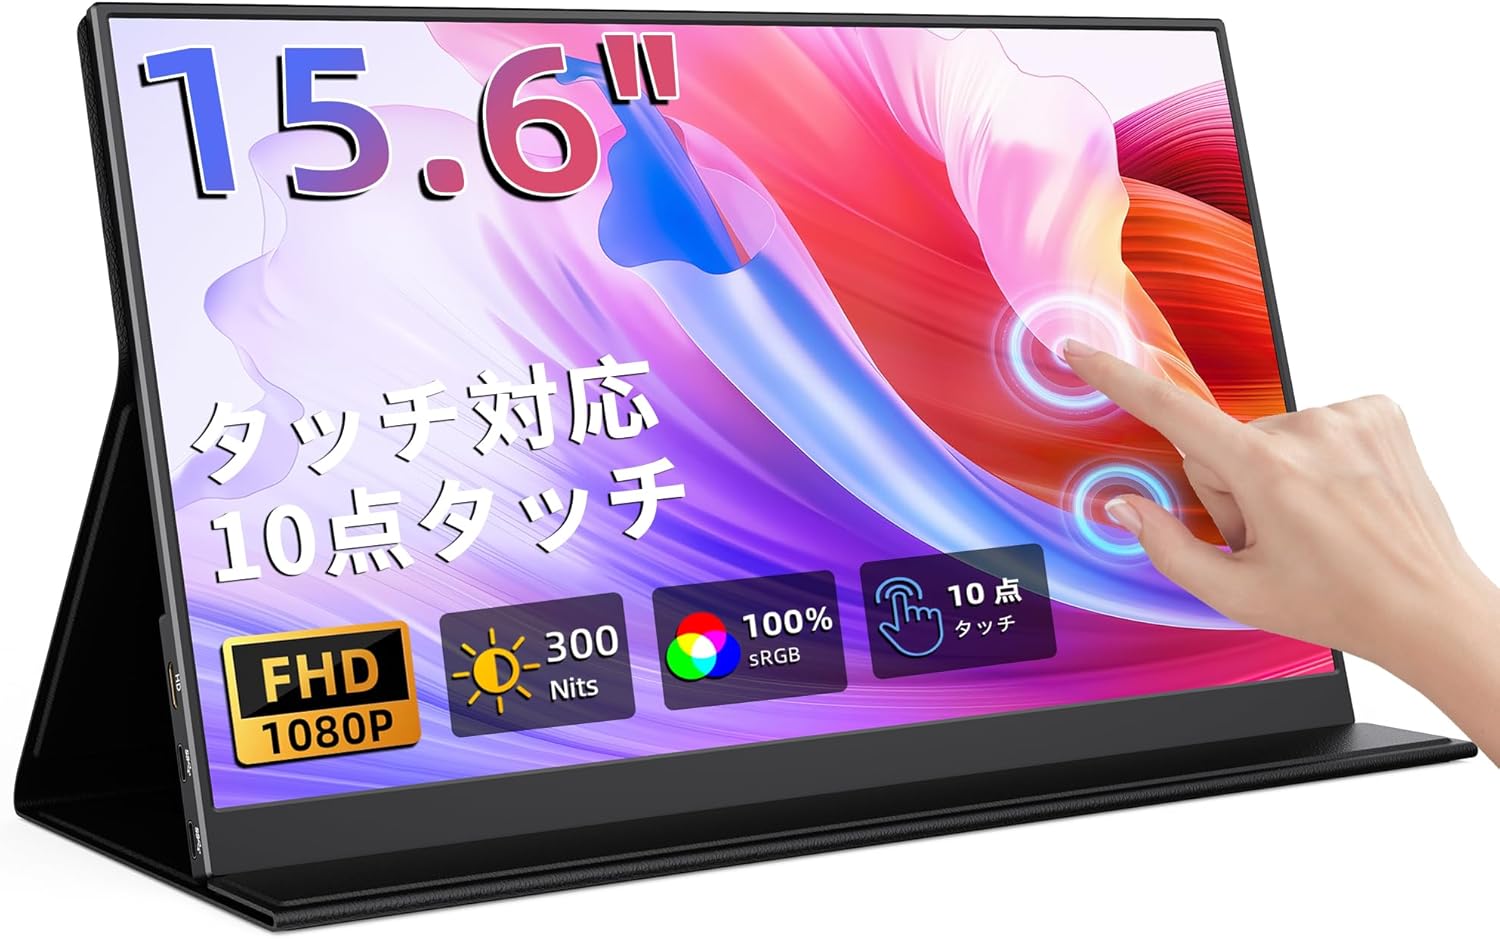
Mobile Monitor
A 15.6-inch FullHD IPS mobile monitor. Choosing an IPS panel avoids the narrow viewing angles common in off-the-shelf photo frames. Mobile monitors are compact and flexible to position.
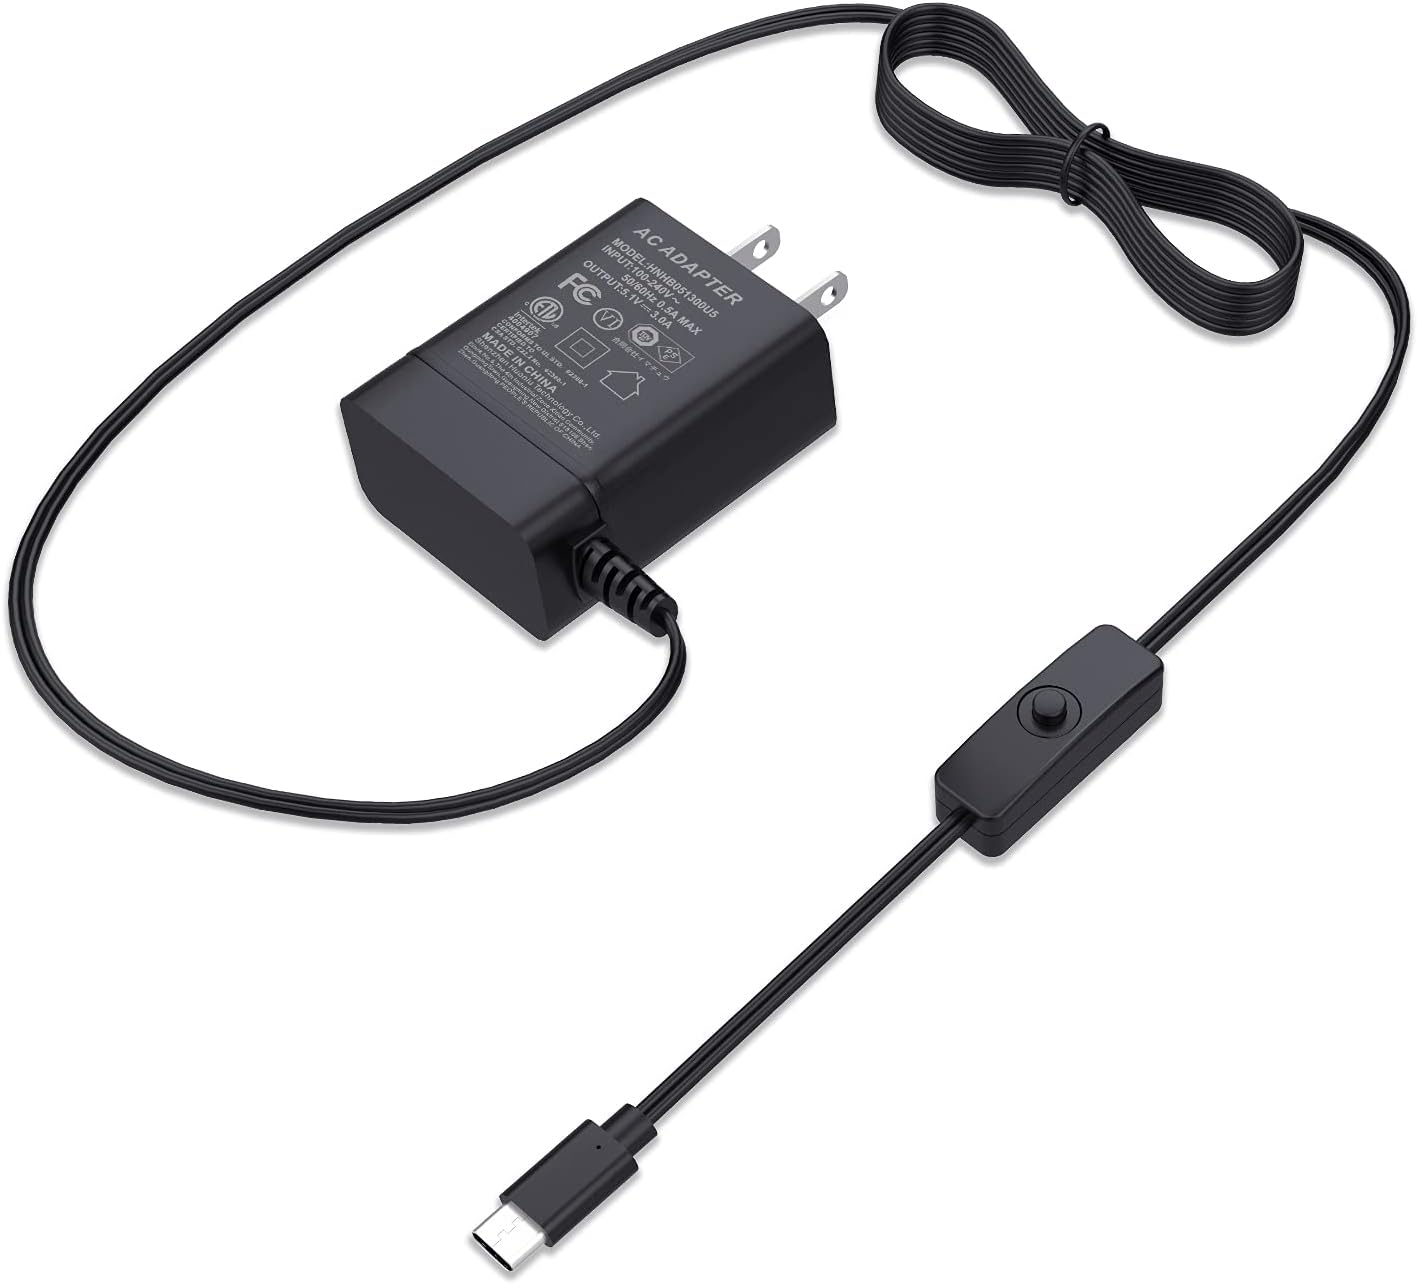
microSD Card and Power Supply

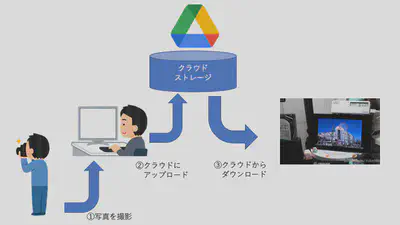
System Architecture
OS: Raspberry Pi OS
Write Raspberry Pi OS to the SD card using Raspberry Pi Imager. Since no desktop is needed for a photo frame, the Lite (CLI-only) version is sufficient.
Image Display: fbi
fbi renders images directly to the framebuffer from the command line. An earlier version used a GUI on Ubuntu but proved unstable, so I switched to this CLI-based approach.
Cloud Storage Sync: rclone
rclone downloads photos from Google Drive on a schedule. It supports over 70 cloud storage providers including Dropbox and S3.
The flow is: rclone downloads photos → fbi displays them as a slideshow.
Setup
Installing Raspberry Pi OS
Use Raspberry Pi Imager to write the image to the SD card.
Either 32-bit or 64-bit works for this use case.
Installing fbi
sudo apt-get -y install fbi
Granting Permissions
By default only root can use fbi to display images. Add the pi user to the video group:
pi@raspi3-photo:~ $ ls -Fla /dev/fb0
crw-rw---- 1 root video 29, 0 Apr  7 10:33 /dev/fb0
sudo usermod -aG video pi
Installing rclone
curl https://rclone.org/install.sh | sudo bash
After installing, run rclone config to authenticate with Google Drive.
rclone config will display a browser authentication URL during setup. Open that URL on another device to authorize access to your Google account.Slideshow Program
Algorithm
- Use
rclone lsto list photos in the designated cloud storage folder - Start downloading images at random once an initial batch is available
- Display downloaded images with
fbi - Continue fetching more images in the background
- Advance to a random new image at the configured interval
- Use weighted random selection — recently shown images are deprioritized
- Run
rclone lsweekly to merge newly added photos into the database - Keep the database in memory (not a JSON file) for faster merging
Language: Python
The slideshow controller is written in Python. The refactored object-oriented version reduced startup time by 1700% compared to the original.
For Python learning, Python 3 Bootcamp by Silicon Valley Engineer (Udemy) was helpful.
Source Code
Published on GitHub:
GitHub - yukishita/photoView4: Cloud-connected slideshow program
Usage
Add this to crontab to start the slideshow at boot:
@reboot /home/pi/photoView4/photoView4.sh
Demonstration
The improved v4 demo. Startup to first image display is dramatically faster than the original:
Original Version (for reference)
The original downloads the full file list before starting, which makes startup slow:
Tips: Scheduled Display Power Off
Running the display 24/7 wastes electricity. Use vcgencmd in crontab to schedule power:
0  0 * * * /usr/bin/vcgencmd display_power 0
30 6 * * * /usr/bin/vcgencmd display_power 1
This turns the display off at midnight and back on at 6:30 AM. A motion or light sensor can make this even more automatic.
Summary
| Component | Role |
|---|---|
| Raspberry Pi 4 | Main computer (low power, always-on) |
| Mobile monitor | FullHD IPS display for high-quality photo viewing |
| fbi | Direct framebuffer image rendering from CLI |
| rclone | Automatically downloads photos from Google Drive |
| Python | Slideshow control with weighted random selection |
Raspberry Pi 4 was used here, but Raspberry Pi Zero 2 W should also work. For an always-on device, choosing a lower-power board reduces running costs.
Tomokatsu Yukishita (雪下 智且)
Engineering Manager / Real Estate Transaction Agent
Engineering manager connecting embedded development with cloud and AI. I apply quality standards from mission-critical systems to modern product and development workflows.