Raspberry Pi と CO2-mini で CO2 濃度をモニターして ZABBIX で記録する
 Image credit: Tomokatsu Yukishita
はじめに
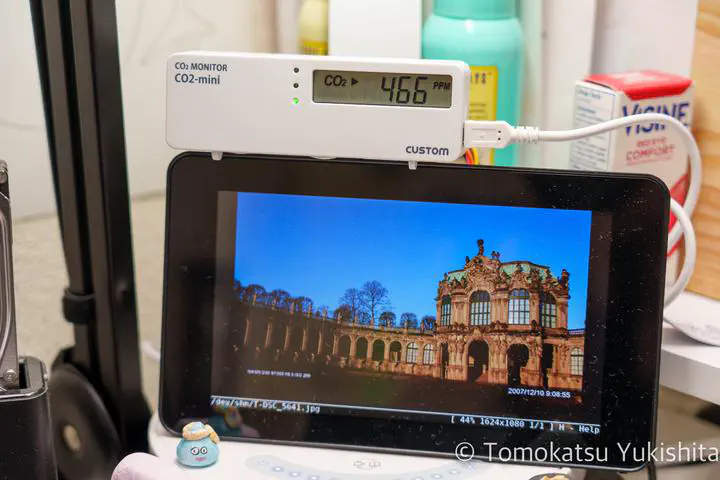
コロナ禍でホームセンターで購入した CO2 モニター “CUSTOM CO2-mini” 。 USB給電で使うのですが、Webを見てみると、どうやら通信もできる模様。 ということで、Raspberry Pi に接続して ZABBIX で部屋の CO2 濃度を記録してみようと思います。
用意するもの
Raspberry Pi
【国内正規代理店品】Raspberry Pi4 ModelB 4GB ラズベリーパイ4 技適対応品【RS・OKdo版】
CO2-mini
カスタム (CUSTOM) CO2モニター CO2-mini
その他、電源やSDカードなど。
Smraza Raspberry Pi 4 USB-C (Type C)電源、5V 3A ラズベリーACアダプター RPi 4b Model B 1GB / 2GB / 4GB/ 8GB適用
サンディスク microSD 128GB UHS-I Class10 Nintendo Switch メーカー動作確認済 SanDisk Ultra SDSQUA4-128G-EPK エコパッケージ
CO2-mini からのデータの取得方法
CO2-mini と Raspberry Pi を USB で接続すれば何もしなくても認識してくれます。 データの取得は先人の方が便利な Python ライブラリを作成いただいています。
GitHub - heinemml/CO2Meter: Python Module to use co2meter code derived from https://hackaday.io/project/5301-reverse-engineering-a-low-cost-usb-co-monitor
この CO2Meter をインストールすればすぐに利用できます。
$ sudo pip3 install git+https://github.com/heinemml/CO2Meter
サンプルコードを参考に以下を作成しました。
from CO2Meter import *
import time
sensor = CO2Meter("/dev/hidraw0")
while True:
    time.sleep(1)
    data = sensor.get_data()
    if 'temperature' in data and 'co2' in data:
        f = open('/dev/shm/co2', 'w')
        f.write(str(data['co2']))
        f.close()

        f = open('/dev/shm/temperature', 'w')
        f.write(str(data['temperature']))
        f.close()
root で起動時に起動するようにしておく
シェルスクリプトを用意して起動時に crontab で自動起動するように設定しておきます。 (rootでないとうまくいかなかったので root 権限で動くようにしてます)
#!/bin/bash

sleep 5
/usr/bin/python /root/co2.py
上記のスクリプトを crontab に追加します。
@reboot /root/co2.sh
ZABBIXで読み込む(zabbix-server側の設定)
色々と方法がありそうですが、私は以下の方法にしました。
- RaspberryPiのシェアードメモリに取得したCO2値を書き込む
- ループして常に最新のデータを保持しておくようにする
- ZABBIX から取得するとき、シェアードメモリに格納してあるファイルを読みに行くようにする
ホストを作成
Raspberry Pi に zabbix-agent をインストールしておきます。 対象のIPアドレスに対してホストを作成しておきます。

アイテムを作成
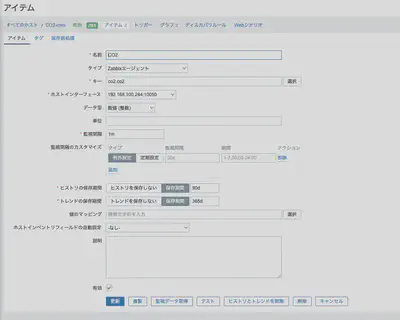
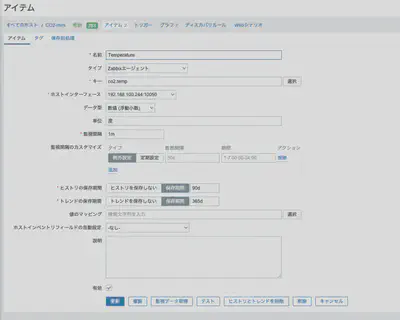
CO2と温度が計測できるので、どちらも取得できるようにアイテムを作成します。


キーは以下にしました。
co2.co2   (CO2濃度)
co2.temp  (温度)
zabbix-agent側の設定
zabbix-agent が動くようにしておきましょう。
/etc/zabbix/zabbix_agentd.conf を編集して zabbix-server のアドレスなどを設定しておきます。
/etc/zabbix/zabbix_agentd.conf
### Option: Server
#       List of comma delimited IP addresses, optionally in CIDR notation, or DNS names of Zabbix servers and Zabbix proxies.
#       Incoming connections will be accepted only from the hosts listed here.
#       If IPv6 support is enabled then '127.0.0.1', '::127.0.0.1', '::ffff:127.0.0.1' are treated equally
#       and '::/0' will allow any IPv4 or IPv6 address.
#       '0.0.0.0/0' can be used to allow any IPv4 address.
#       Example: Server=127.0.0.1,192.168.1.0/24,::1,2001:db8::/32,zabbix.example.com
#
# Mandatory: yes, if StartAgents is not explicitly set to 0
# Default:
# Server=

Server= サーバーアドレス

##### Active checks related

### Option: ServerActive
#       List of comma delimited IP:port (or DNS name:port) pairs of Zabbix servers and Zabbix proxies for active checks.
#       If port is not specified, default port is used.
#       IPv6 addresses must be enclosed in square brackets if port for that host is specified.
#       If port is not specified, square brackets for IPv6 addresses are optional.
#       If this parameter is not specified, active checks are disabled.
#       Example: ServerActive=127.0.0.1:20051,zabbix.domain,[::1]:30051,::1,[12fc::1]
#
# Mandatory: no
# Default:
# ServerActive=

ServerActive=サーバーアドレス

### Option: Include
#       You may include individual files or all files in a directory in the configuration file.
#       Installing Zabbix will create include directory in /etc/zabbix, unless modified during the compile time.
#
# Mandatory: no
# Default:
# Include=

# Include=/etc/zabbix/zabbix_agentd.userparams.conf
# Include=/etc/zabbix/zabbix_agentd.conf.d/
Include=/etc/zabbix/zabbix_agentd.conf.d/*.conf
/etc/zabbix/zabbix_agentd.conf.d/userparameter_co2.conf
パラメータ取得用のconfigファイルを作成します。 シェアードメモリに格納したファイルを cat するだけ。
UserParameter=co2.co2,cat /dev/shm/co2
UserParameter=co2.temp,cat /dev/shm/temperature
zabbix-agentは再起動しておきましょう。
実行結果
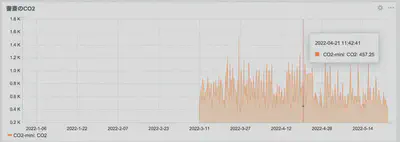
無事、CO2濃度と温度を取得して zabbix でプロットすることができました。

CO2が取得できました
まとめ
Raspberry Pi + CO2-mini + zabbix でモニターする方法をまとめました。 CO2モニターを購入してから換気の頻度がかなり上がりました。

設置してからの推移 冬は換気すると寒い。
スクリプトのダウンロード
作成したスクリプトは以下からダウンロードすることができます。
GitHub - yukishita/co2-mini: CUSTOM CO2-mini を使って ZABBIX で CO2 濃度を記録するプログラム


